 webpins
How to organize photos: a simple method that lasts
By webpins.net, updated on
Organizing photos does not have to take a whole weekend. What works is a short method: gather everything in one place, remove the duplicates, sort by subject into albums and give them names you will still understand in ten years. After that, keeping it tidy takes a few minutes a month.
Before you start: pick one place
The mess nearly always comes from scattered photos: some on the phone, some on the computer, more on an old USB stick and in messaging apps. Organizing each place separately is double the work and leaves copies behind.
Pick one main place where your photos will live and be organized: a folder on your computer, your phone's photos app or a gallery like webpins, which keeps photos in your browser, with no account and no cloud. The other places become backups, not parallel archives.
The method in five steps
- Gather everything. Bring the photos from each device and folder into the main place. Do not try to organize on the way: gather first.
- Remove the duplicates. Gathering photos from several places always ends with copies of the same picture. Get rid of them before making albums, or you will organize the same photo twice. The guide how to remove duplicate photos shows how.
- Delete what is no good. Blurry shots, screenshots that have done their job, ten near-identical photos of the same sunset: keep the best one. Fewer photos are easier to enjoy and to keep.
- Sort by subject, into albums. A trip, a birthday, the family, documents. Start with the big subjects; do not make an album for every day.
- Give names that explain themselves. “IMG_4821.jpg” says nothing. A name like “Beach 2026 05” is easy to find in a search and stays in order.
Albums or folders by date?
Both work, and you can combine them:
- By date (a folder per year or month) is automatic and never leaves you wondering where a photo goes. But it is poor at finding “every photo of the dog”.
- By subject (albums) is how people remember photos: “the trip to the mountains”, “Anna's wedding”. It asks for a decision per photo, but it is what makes a collection a pleasure to look at.
In practice, the date is already inside almost every photo file: cameras and phones record the day and time a photo was taken in its EXIF data. A gallery that reads it sorts by date on its own, and you only need to care about the albums by subject.
How to do it in webpins
webpins is free, with no sign-up and no ads, and your photos stay on your device. Each step of the method has a feature of its own:
1. Gather everything at once
In Add photos, choose files, drag them onto the page, or use Add a folder… to bring in a whole folder; each subfolder can become an album. .zip files with photos come in too.
2. Duplicates are left out on their own
The gallery recognizes the same picture by its contents, even under another name or from another folder, and does not add it again. At the end, it tells you how many “were already in the gallery”.
3. Sort to see better
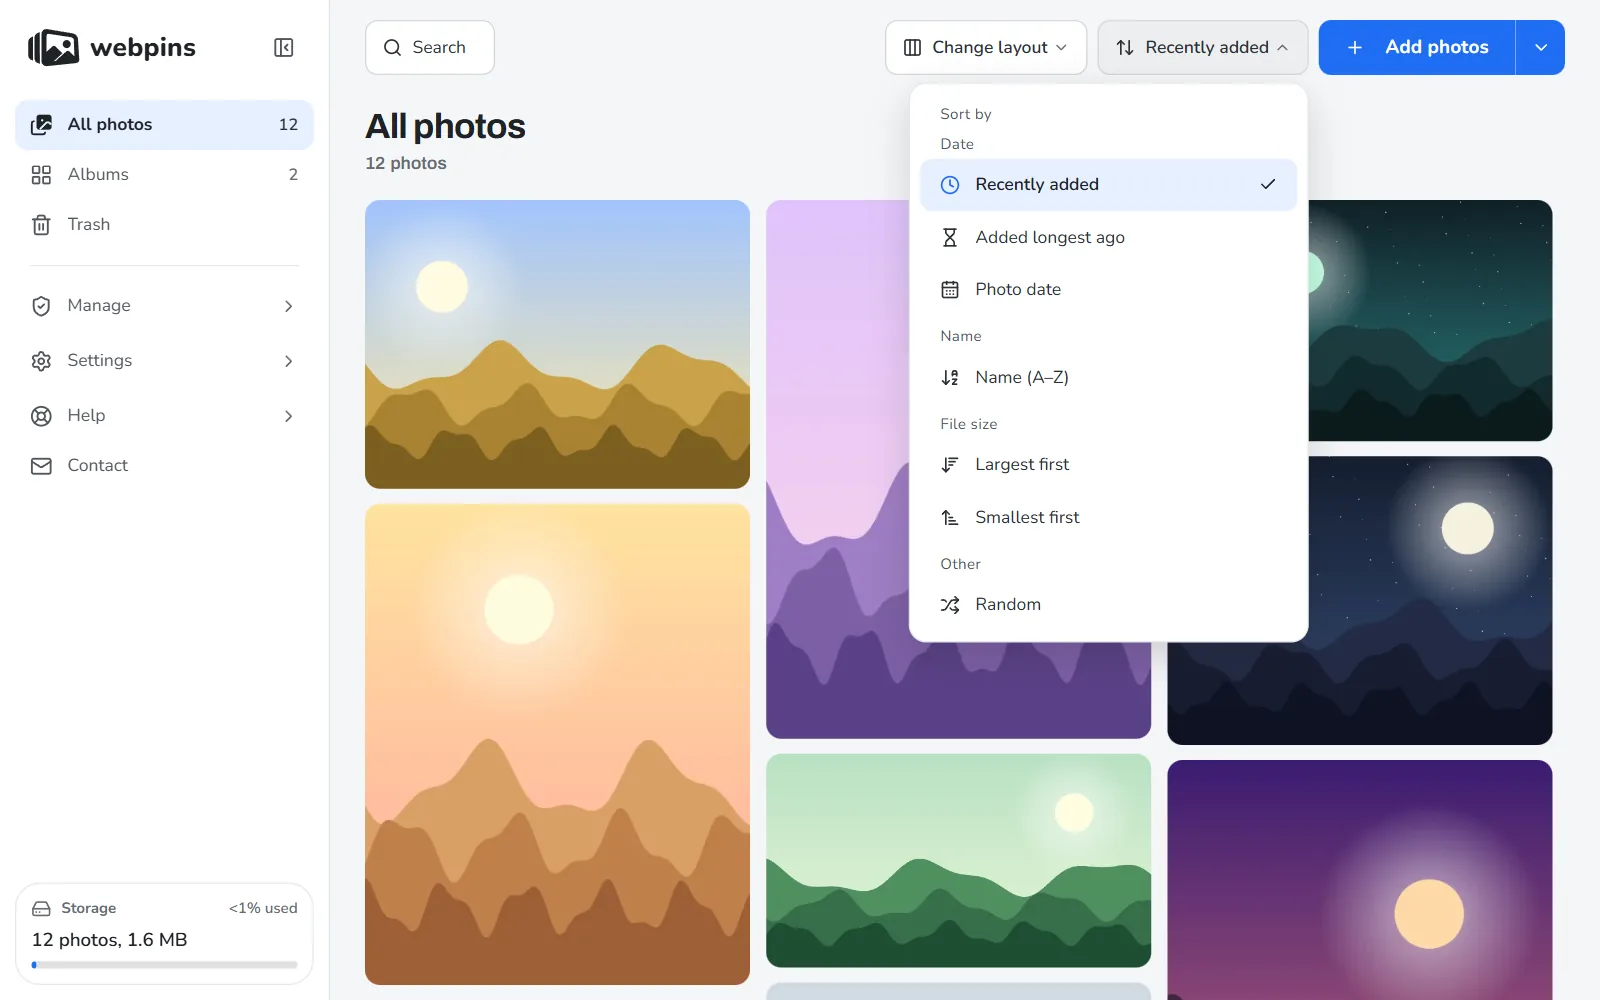
The sort button at the top of the gallery shows photos by photo date (the EXIF one, when the file has it), by the date they were added, by name, by file size or in random order. Sorting by size, largest first, is a quick way to find huge photos that take up space.
4. Albums by subject
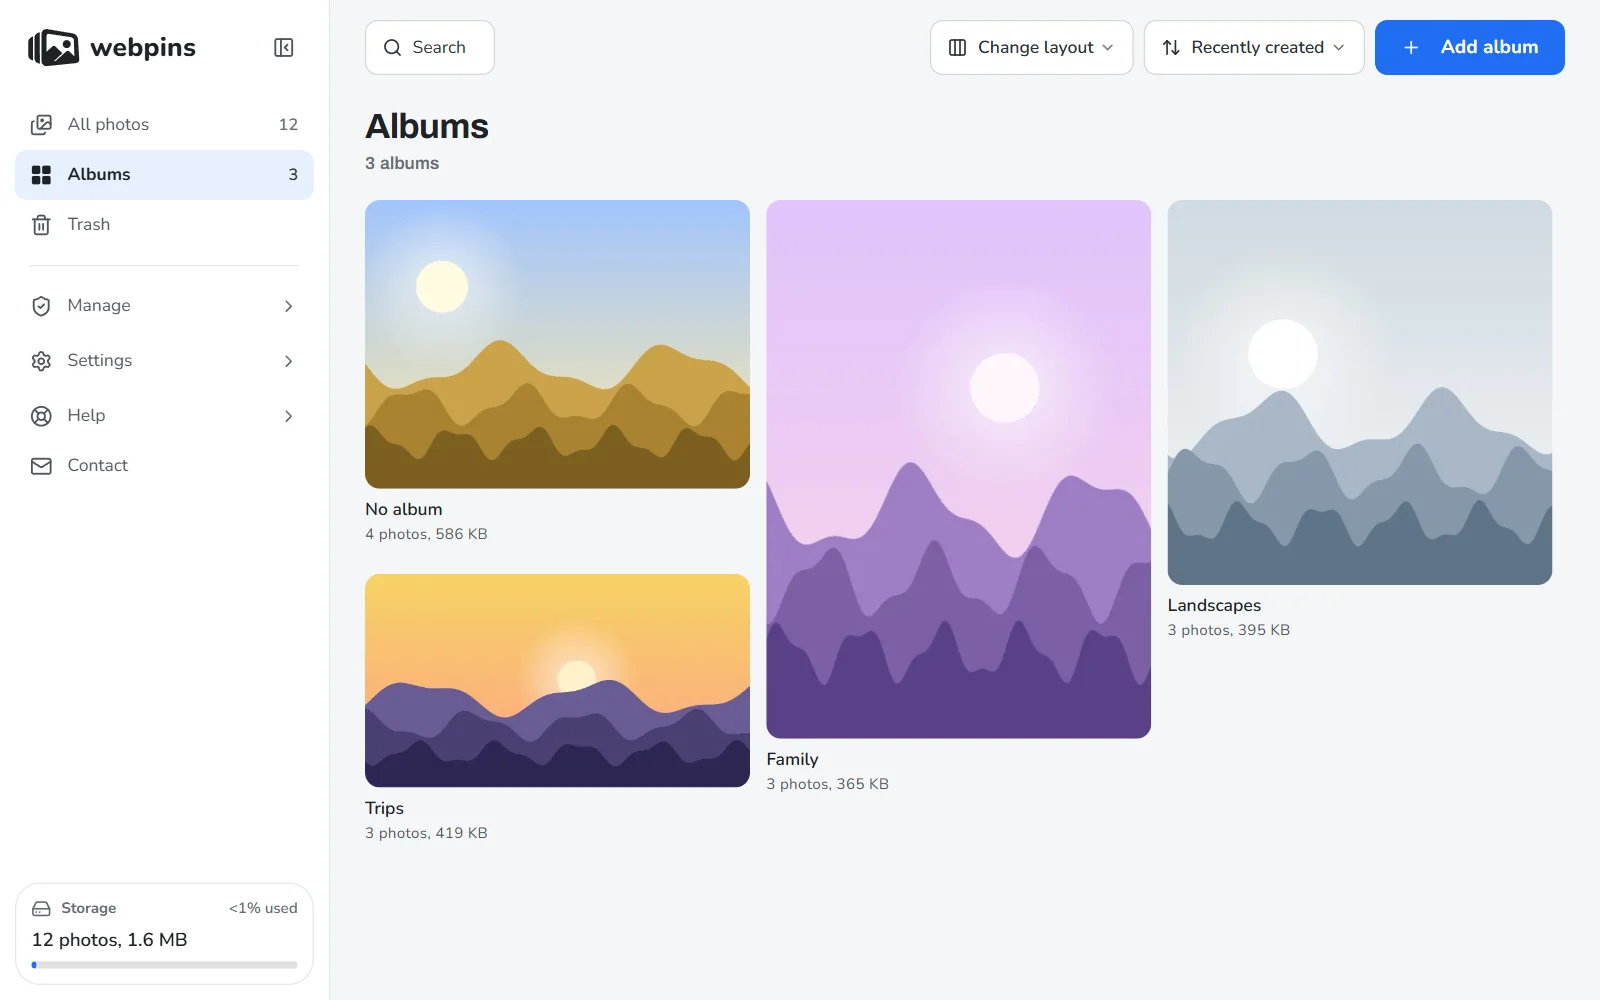
Create an album in Albums and bring photos to it: hover over a photo and choose Save, or select several and drag them onto the album's name. The Albums page shows them all at once, each with a cover photo you can pin when editing the album. Albums can be sorted by creation date, name, number of photos or size.
5. Rename many at once
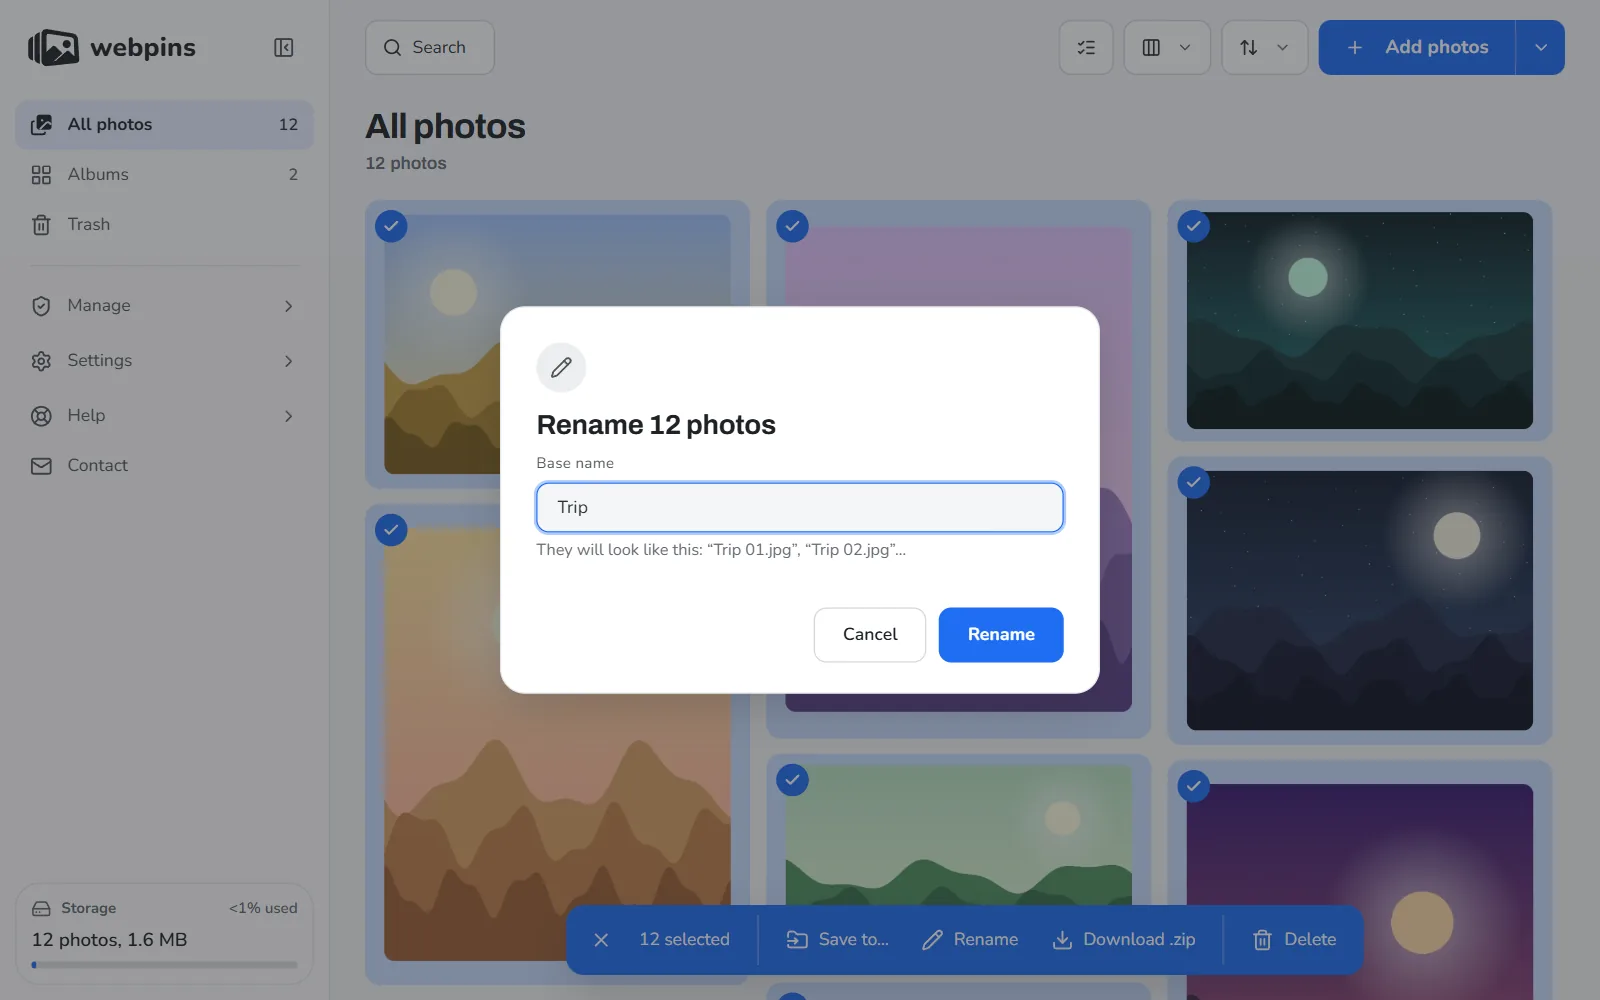
Select the photos (click with Ctrl to add one, with Shift for a range, or Ctrl + A for all) and choose Rename, or press F2. With several selected, you type a base name, such as “Trip”, and they are numbered in the order they appear: “Trip 01”, “Trip 02”… (the leading zero, with 10 photos or more, keeps them in order in any folder). The file extension is kept.
6. Find them later
Search (/ or Ctrl + K) looks through names and captions. To write a caption, open the photo and press I: a person's or a place's name in the caption is what makes a photo show up in a search years later.
How to keep it organized
- One moment a month. Set aside ten minutes to bring in new photos from your phone, delete the bad ones and put the rest into albums. With little piled up, it is quick.
- Delete safely. In webpins, what you delete goes to the trash and stays there for 30 days, and Ctrl + Z undoes the last action. You can clean up without fear.
- Make a copy after organizing. Lost organization is as much work as lost photos. The webpins backup keeps the original photos together with the albums, names and captions.
Frequently asked questions
What is the best way to organize photos?
Gather everything in one place, remove the duplicates, delete the bad ones and sort the rest into albums by subject, with names that explain themselves. The photo itself already keeps the date; what is missing to find it later is the subject.
Is it better to organize photos by date or by subject?
By subject, if your gallery already sorts by the date the photo was taken. That way you get both: the automatic timeline and the albums the way you remember the photos.
How do I organize thousands of old photos?
Do not try to do it all at once. Gather and remove duplicates first, which is automatic. Then organize one year or one subject at a time, starting with what you most want to see again.
Does organizing photos in webpins change the files on my computer?
No. The gallery keeps its own copies in the browser. The original files on your computer stay where they were, with the same names. If you turn on saving to a folder on your computer, webpins writes an organized copy there, with a subfolder per album.
Sources
- CIPA: the Exif standard, where cameras record each photo's date and device
- Apple: create and work with photo albums on iPhone
- Google: create and edit photo albums in Google Photos
About this guide: written by the people who make webpins.net. What it says about webpins was checked on the site itself on the date of the last update; for the other services, what each of them states applies (see the sources above). Spotted something out of date? Write to hello@webpins.net.
Organize your photos now: open the gallery with no sign-up, and try it with the sample photos.
Open webpins